
Download UBUNTU 12.04 User Guide
Download IT@School Ubuntu 14.04
Download IT@School Ubuntu 14.04
(First you extract downloaded file ubuntu-14.04.1-desktop-i386.tar.gz)
then burn it to Drive or DVD)
windows os File sharing / Printer Sharing Helps
Malayalam typing help - Malayalam inscript keyboard
Steps to Update latest verson of Mozilla Firefox in Computers with IT @ School Edubuntu OS
Malayalam typing help - Malayalam inscript keyboard
Steps to Update latest verson of Mozilla Firefox in Computers with IT @ School Edubuntu OS
UPDATING MOZILLA TO THE LATEST VERSION (Using Terminal Window)
- Open Terminal Window
- Copy the following Code and Paste it in the Terminal Window
sudo add-apt-repository ppa:mozillateam/firefox-next
(Give the system Password when asks)
- After Completing the Process Copy the following Code and Paste it in the Terminal Window
sudo apt-get update
- After Completing the Process Copy the following Code and Paste it in the Terminal Window
sudo apt-get install firefox
- Give Y when asks for Y or N
Printer Driver – DELL 1133
മലയാളം ടൈപ്പിങ്ങ് സ്പീഡ് സോഫ്റ്റ്വെയര്
UBUNTU 10.04 ഉപയോഗിക്കുന്നവര്ക്ക്
Click Here For TypeSpeedGam(10.04).tar.gz
Click Here For malayalam typespeed_Source(10.04) .tar.gz
UBUNTU 14.04 ഉപയോഗിക്കുന്നവര്ക്ക്
Click Here For TypeSpeedGam(14.04).tar.gz
Click Here For malayalamtypespeed_Source(14.04) .tar.gz
 അതിനു ശേഷം വരുന്ന ജാലകത്തില് Auto eth0 select ചെയ്ത് Edit click ചെയ്യുക

ഇപ്പോള് തുറന്നു വരുന്ന 'Editing Auto eth0' എന്ന ജാലകത്തിലെ ‘IPv4 Settings’ tab select ചെയ്ത് method എന്ന option ല് manual ആക്കുക. അതിനു ശേഷം Add ബട്ടനില് click ചെയ്ത് IP address താഴെ പറയുന്ന രീതിയില് set ചെയ്യുക.
Address : 192.168.0.1 ( ഒരോ കമ്പ്യൂട്ടറിനും വ്യത്യസ്ത Address നല്ക്കുക. Eg : 192.168.0.2, 192.168.0.3 etc)
Netmask : 255.255.255.0
Gateway : 192.168.1.1 ( Internet Modem IP address)
DNS servers: 192.168.1.1 ( Internet Modem IP address)
Apply ബട്ടണ് അമര്ത്തുക. അതിനു ശേഷം Network restart ചെയ്യുക.

Network restart ചെയ്യാന്
Applications-Accessories-Terminalഎന്ന ക്രമത്തില് ടെര്മിനല് തുറന്ന്
sudo /etc/init.d/networking restart എന്ന് ടൈപ്പ് ചെയ്ത് Enter അടിക്കുക
മുകളില് പറഞ്ഞിരിക്കുന്ന കാര്യങ്ങള് network ചെയ്ത ഓരോ computer ലും അവര്ത്തിക്കുക. ഓരോ computerനും പ്രത്യേകം IP address നല്ക്കാന് മറക്കരുത്.
System–Administration–Printing എന്ന option select ചെയ്യുക.
ഇപ്പോള് computer ല് add ചെയ്ത printer കാണാം.
 ഇതില് Server–Settings എന്ന option select ചെയ്യുക.
അതിലെ എല്ലാ ഓപ്ഷനിലെയും check box click ചെയ്യുക. Ok ബട്ടണ് അമര്ത്തുക.
 Install ചെയ്ത printer ല് right click ചെയ്ത് shared option select അണോ എന്ന് പരിശോധിക്കുക. Select അല്ലായെങ്കില് select ചെയ്യുക.
Network ചെയ്ത computer കളില് ചെയ്യേണ്ട പ്രവര്ത്തനങ്ങള്
System–Administration–Printing എന്ന option select ചെയ്യുക.
ഇപ്പോള് കിട്ടുന്ന printing എന്ന ജാലകത്തില് add ബട്ടണ് select ചെയ്യുക.
 ഇപ്പോള് കിട്ടുന്ന New printer ജാലകത്തില് Select Device എന്ന option ല് Network Printer select ചെയ്യുക.
തുടര്ന്ന് വരുന്ന option നില് Find Network Printer select ചെയ്യുക.
ഇപ്പോള് കിട്ടുന്ന ജാലകത്തില് Host എന്ന option ന് നേര്ക്ക് printer connect ചെയ്ത computer ന്റെ IP address type ചെയ്ത് Find ബട്ടണ് അമര്ത്തുക.
 കുറച്ച് സമയത്തിന് ശേഷം printer find ചെയ്ത് verify option കാണിക്കും.
verify ബട്ടണ് click ചെയ്ത് verify ചെയ്യുക.
അതിനു ശേഷം Forward ബട്ടണ് അമര്ത്തുക.
Printer driver install ചെയ്തതിനു ശേഷം വരുന്ന ജാലകത്തില് Apply ബട്ടണ് അമര്ത്തുക.
ഇപ്പോള് network printer add ആയി കഴിഞ്ഞു.
ഇതേ രീതിയില് share ചെയ്ത windows printer നെ network printer ആയി add ചെയ്യാം
File Sharing ( Connect to sever)
Places–Connect to server എന്ന option select ചെയ്യുക.
ഇപ്പോള് കിട്ടുന്ന ജാലകത്തില് service type SSH select ചെയ്യുക.
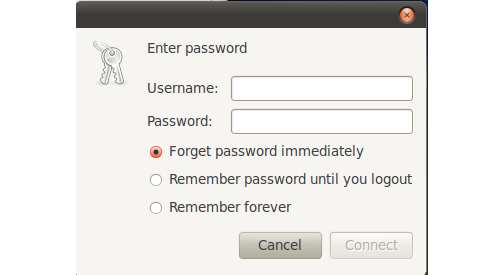
Server എന്ന option ന് നേര്ക്ക് connect ചെയ്യാനുളള computer ന്റെ IP address type ചെയ്യുക. connect ബട്ടണ് അമര്ത്തുക.


Connect ചെയ്യാനുളള computer ന്റെ user name ഉം password ഉം type ചെയ്ത് login ചെയ്യുക.
 File sharing ( Windows & Linux) samba വഴി
UBUNTU 10.04 ഉപയോഗിക്കുന്നവര്ക്ക്
Click Here For TypeSpeedGam(10.04).tar.gz
Click Here For malayalam typespeed_Source(10.04) .tar.gz
UBUNTU 14.04 ഉപയോഗിക്കുന്നവര്ക്ക്
Click Here For TypeSpeedGam(14.04).tar.gz
Click Here For malayalamtypespeed_Source(14.04) .tar.gz
Network IP Address set ചെയ്യാന്
System – Preferences – Network Connections. എന്ന option select ചെയ്യുക. അതിനു ശേഷം വരുന്ന ജാലകത്തില് Auto eth0 select ചെയ്ത് Edit click ചെയ്യുക
ഇപ്പോള് തുറന്നു വരുന്ന 'Editing Auto eth0' എന്ന ജാലകത്തിലെ ‘IPv4 Settings’ tab select ചെയ്ത് method എന്ന option ല് manual ആക്കുക. അതിനു ശേഷം Add ബട്ടനില് click ചെയ്ത് IP address താഴെ പറയുന്ന രീതിയില് set ചെയ്യുക.
Address : 192.168.0.1 ( ഒരോ കമ്പ്യൂട്ടറിനും വ്യത്യസ്ത Address നല്ക്കുക. Eg : 192.168.0.2, 192.168.0.3 etc)
Netmask : 255.255.255.0
Gateway : 192.168.1.1 ( Internet Modem IP address)
DNS servers: 192.168.1.1 ( Internet Modem IP address)
Apply ബട്ടണ് അമര്ത്തുക. അതിനു ശേഷം Network restart ചെയ്യുക.

Network restart ചെയ്യാന്
Applications-Accessories-Terminalഎന്ന ക്രമത്തില് ടെര്മിനല് തുറന്ന്
sudo /etc/init.d/networking restart എന്ന് ടൈപ്പ് ചെയ്ത് Enter അടിക്കുക
മുകളില് പറഞ്ഞിരിക്കുന്ന കാര്യങ്ങള് network ചെയ്ത ഓരോ computer ലും അവര്ത്തിക്കുക. ഓരോ computerനും പ്രത്യേകം IP address നല്ക്കാന് മറക്കരുത്.
Printer share ചെയ്യാന്
Printer connect ചെയ്തിട്ടുളള computer ല് ചെയ്യേണ്ട പ്രവര്ത്തനങ്ങള്System–Administration–Printing എന്ന option select ചെയ്യുക.
ഇപ്പോള് computer ല് add ചെയ്ത printer കാണാം.
 ഇതില് Server–Settings എന്ന option select ചെയ്യുക.
അതിലെ എല്ലാ ഓപ്ഷനിലെയും check box click ചെയ്യുക. Ok ബട്ടണ് അമര്ത്തുക.
 Install ചെയ്ത printer ല് right click ചെയ്ത് shared option select അണോ എന്ന് പരിശോധിക്കുക. Select അല്ലായെങ്കില് select ചെയ്യുക.
Network ചെയ്ത computer കളില് ചെയ്യേണ്ട പ്രവര്ത്തനങ്ങള്
System–Administration–Printing എന്ന option select ചെയ്യുക.
ഇപ്പോള് കിട്ടുന്ന printing എന്ന ജാലകത്തില് add ബട്ടണ് select ചെയ്യുക.
 ഇപ്പോള് കിട്ടുന്ന New printer ജാലകത്തില് Select Device എന്ന option ല് Network Printer select ചെയ്യുക.
തുടര്ന്ന് വരുന്ന option നില് Find Network Printer select ചെയ്യുക.
ഇപ്പോള് കിട്ടുന്ന ജാലകത്തില് Host എന്ന option ന് നേര്ക്ക് printer connect ചെയ്ത computer ന്റെ IP address type ചെയ്ത് Find ബട്ടണ് അമര്ത്തുക.
 കുറച്ച് സമയത്തിന് ശേഷം printer find ചെയ്ത് verify option കാണിക്കും.
verify ബട്ടണ് click ചെയ്ത് verify ചെയ്യുക.
അതിനു ശേഷം Forward ബട്ടണ് അമര്ത്തുക.
Printer driver install ചെയ്തതിനു ശേഷം വരുന്ന ജാലകത്തില് Apply ബട്ടണ് അമര്ത്തുക.
ഇപ്പോള് network printer add ആയി കഴിഞ്ഞു.
ഇതേ രീതിയില് share ചെയ്ത windows printer നെ network printer ആയി add ചെയ്യാം
File Sharing ( Connect to sever)
Places–Connect to server എന്ന option select ചെയ്യുക.
ഇപ്പോള് കിട്ടുന്ന ജാലകത്തില് service type SSH select ചെയ്യുക.
Server എന്ന option ന് നേര്ക്ക് connect ചെയ്യാനുളള computer ന്റെ IP address type ചെയ്യുക. connect ബട്ടണ് അമര്ത്തുക.


Connect ചെയ്യാനുളള computer ന്റെ user name ഉം password ഉം type ചെയ്ത് login ചെയ്യുക.
 File sharing ( Windows & Linux) samba വഴി
- Windows ഉം Linux ഉം തമ്മില് file, printer തുടങ്ങിയവ share ചെയ്യാന് ഉപയോഗിക്കുന്ന ഒരു free software ആണ് samba .
- Synaptic package manager വഴി computer ല് samba install ചെയ്തിട്ടുണ്ടോ എന്ന് പരീശോധിക്കുക.
- ഇല്ലായെങ്കില് internet connect ചെയ്ത computer കളില് terminal ല് sudo apt-get install samba smbfs എന്ന് type ചെയ്ത് enter അമര്ത്തുക
HOW TO INSTALL CANON MF 3010 IN UBUNTU 14.04
https://wiki.debian.org/PrinterDriver/Canon/UFR-II
എന്ന വിലാസത്തില് നല്കിയിട്ടുള്ള വിവരങ്ങള് വെച്ച് പ്രിന്റര് ഡ്രൈവര്
അടങ്ങിയ tar.gz ഫയല്
http://gdlp01.c-wss.com/gds/0/0100005950/04/Linux_UFRIILT_PrinterDriver_V130_uk_EN.tar.gz എന്ന വിലാസത്തില് നിന്ന് ഡൗണ്ലോഡ് ചെയ്യാവുന്നതാണ്.
ഡൗണ്ലോഡ് ചെയ്ത ഫയല് Extract ചെയ്ത് 32-bit_Driver > Debian ഫോള്ഡര് തുറന്ന് എന്നീ cndrvcups-common , cndrvcups-ufr2 എന്നീ .deb പാക്കേജുകള് കണ്ടെത്തുക. ആദ്യം cndrvcups-common പാക്കേജ് Ubuntu software center ലോ GDebi Package Installer ലോ തുറന്ന് ഇന്സ്റ്റാള് ചെയ്യുക. തുടര്ന്ന് cndrvcups-ufr2 പാക്കേജും അതുപോലെ ഇന്സ്റ്റാള് ചെയ്യുക. ഡിപ്പന്റന്സി പാക്കേജുകള് ഇന്സ്റ്റാള് ചെയ്യുവാന് sudo apt-get install libc6-i386 libxml2:i386 lib32z1 libjpeg62:i386 libstdc++6:i386 കമാന്റ് Terminal ല് നല്കി പ്രവര്ത്തിപ്പിക്കുക. പാക്കേജുകള് ഇന്സ്റ്റാള് ചെയ്തതിന് ശേഷം Settings > Printers എടുത്ത് Canon MF 3010 പ്രിന്റര് add ചെയ്യുക. അല്ലെങ്കില് പ്രിന്റര് add ചെയ്യാന് ഇനി നല്കിയ സ്റ്റെപ്പുകള് പിന്തുടരുക..
Using your favourite internet browser go to http://localhost:631/admin
1. Click on "Add Printer" button
2. If the browser asks for your username and password enter your username and password (or root plus root's password).
3. Under "Local Printers" select the appropriate printer model
4. Click on "Continue" button
5. On the next page leave default settings as is for "Name", "Description", "Location". Unless you know what you're doing.
6. Click on "Continue" button
7. On the next page, under "Model" the appropriate printer model should be automatically selected. If not select the appropriate model.
8. Click on "Add Printer" button
9. On the next page under "General" section select your preferred settings. If unsure leave default settings.
10. Click on "Set Default Options"
11. Wait up to 30 seconds
12. On the next page click on "Maintenance" dropdown menu select "Print Test Page" option. Wait up to 60 seconds. If successful the printer will print a test page.
1. If above is not working ensure your printer is not on hibernation or standby mode.
HOW INSTALL CANON LBP 2900B IN UBUNTU-14.04
കമ്പ്യൂട്ടറില് ഇന്റര്നെറ്റ് കണക്ഷന് ഉണ്ടെന്ന് ഉറപ്പ് വരുത്തുക.
http://gdlp01.c-wss.com/gds/6/0100004596/03/Linux_CAPT_PrinterDriver_V260_uk_EN.tar.gz ല് നിന്ന് ഡ്രൈവറുകള് അടങ്ങിയ ഫയല് ഡൗണ്ലോഡ് ചെയ്യുക.ഡൗണ്ലോഡ് ചെയ്ത ഫയല് Extract ചെയ്ത് 32-bit_Driver/Debian ഫോള്ഡര് തുറന്ന് cndrvcups-common.deb, cndrvcups-capt.deb എന്നീ പാക്കേജുകള് കണ്ടെത്തുക.ആദ്യം cndrvcups-common.deb പാക്കേജ് Ubuntu software center ല് തുറന്ന് ഇന്സ്റ്റാള് ചെയ്യുക; തുടര്ന്ന് cndrvcups-capt.deb പാക്കേജും അതുപോലെ ഇന്സ്റ്റാള് ചെയ്യുക.കമാന്റുകള് പ്രവര്ത്തിപ്പിക്കാനായി Terminal തുറക്കുക.ഇനി താഴെ നല്കിയിട്ടുള്ള കമാന്റുകള് ഓരോന്നായി Terminal ല് നല്കി പ്രവര്ത്തിപ്പിക്കുക. (copy&paste) പാസ്വേര്ഡ് ചോദിക്കുമ്പോള് നല്കുക.
sudo service cups restart
sudo lpadmin -p LBP2900 -m CNCUPSLBP2900CAPTK.ppd -v ccp://localhost:59687 -E
sudo ccpdadmin -p LBP2900 -o /dev/usb/lp0
sudo /etc/init.d/ccpd start
sudo apt-get purge system-config-printer-udev
sudo update-rc.d cups defaults
sudo gedit /etc/rc.local
മുകളിലെ കമാന്റ് നല്കി കഴിയുമ്പോള് rc.local എന്ന ഫയല് തുറന്ന് വരും. അതില് exit 0 എന്ന വരിക്ക് മുകളില് മറ്റൊരു വരിയായി sleep 12 && /etc/init.d/ccpd start ചേര്ക്കുക; ഫയല് സേവ് ചെയ്ത് ക്ലോസ് ചെയ്യുക.
sudo update-rc.d ccpd defaults എന്ന കമാന്റ് പ്രവര്ത്തിപ്പിക്കരുത്; മുമ്പ് എപ്പോഴെങ്കിലും sudo update-rc.d ccpd defaults എന്ന കമാന്റ് പ്രവര്ത്തിപ്പിച്ചിട്ടുണ്ടെങ്കില് /etc ഡയറക്ടറിയിലെ rc0.d, rc1.d, rc2.d, rc3.d, rc3.d, rc4.d, rc5.d, rc6.d, rcS.d എന്നീ ഫോള്ഡറുകളിലെ ccpd എന്ന പേരുള്ള ലിങ്കുകള് മാത്രം delete ചെയ്യുക. അതിനായി /etc ഫോള്ഡര് തുറക്കുവാന് sudo nautilus /etc എന്ന കമാന്റ് ടെര്മിനലില് നല്കുക.ഇനി കമ്പ്യൂട്ടര് റീ സ്റ്റാര്ട്ട് ചെയ്യുക.System Settings ല് Printers തുറന്ന് രണ്ട് പ്രിന്ററുകള് കാണുന്നുണ്ടെങ്കില് പ്രിന്ററില് right click ചെയ്ത് Printer Properties ല് Device URI usb://Canon/LBP2900 എന്ന് കാണുന്ന പ്രിന്ററിന്റെ Policies ല് State ന് താഴെയുള്ള മൂന്ന് ടിക്കുകളും കളയുക captstatusui -P LBP2900 കമാന്റ് ടെര്മിനലില് നല്കി പ്രിന്ററിന്റെ സ്റ്റാറ്റസ് പരിശോധിക്കാം. ഇനി പ്രിന്റ് ചെയ്ത് നോക്കൂ ഉബുണ്ടുവില് സോഫ്റ്റ് വെയര് അപ്പ്ഡേറ്റുകള് ഇന്സ്റ്റാള് ചെയ്ത് കഴിഞ്ഞ് പ്രിന്റര് പ്രവര്ത്തിക്കാതെ വരികയാണെങ്കില് (11), (12) സ്റ്റെപ്പുകള് മാത്രം ആവര്ത്തിച്ച് കമ്പ്യൂട്ടര് റീ സ്റ്റാര്ട്ട് ചെയ്യുക
CANON LBP 2900 PRINTER INSTALLATION
CANON LBP 2900 PRINTER ഇന്സ്റ്റാള്( Ubuntu-10.04) ചെയ്യുന്നതിനുള്ള സ്റ്റെപ്പുകള് ചുവടെ നല്കിയിരിക്കുന്നു. [ഇവിടെ കൊടുത്തിരിക്കുന്ന ഡ്രൈവറിൽ INSTALLER ADD ചെയ്തിരിക്കുന്നു]
ചുവടെയുള്ള ലിങ്കുകളില് നിന്ന് PRINTER DRIVER, INSTALLER ഇവ DOWNLOAD ചെയ്യുക.
- PRINTER DRIVER INSTALLER
- DOWNLOAD ചെയ്ത PRINTER DRIVER റൈറ്റ് ക്ലിക്ക് ചെയ്ത് EXTRACT HERE എന്ന ഓപ്ഷന് സെലക്റ്റ് ചെയ്യുക.
- അപ്പോള് കിട്ടിയ ഫോള്ഡറിലേക്ക് DOWNLOAD ചെയ്ത INSTALLER(Install_LBP2900) കോപ്പി ചെയ്യുക.
- ശേഷം Install_LBP2900 റൈറ്റ് ക്ലിക്ക് ചെയ്ത് Properties Permission എന്നതില് Allow executing file as program ടിക്ക് ചെയ്യുക.
- ശേഷം Install_LBP2900 ഡബിള് ക്ലിക്ക് ചെയ്ത് Run in terminal സെലക്റ്റ് ചെയ്യുക. Password ടൈപ്പ് ചെയ്ത് Enter ചെയ്യുക. അല്പ്പ സമയത്തിനകം Installation പൂര്ത്തിയാകുന്നതാണ്.
Canon LBP 2900 B Driver വീണ്ടും Printer Error കാണിച്ചാല് പരിഹാരം
2. Go to Network Icon on top panel -> Edit Connections …, then click the Add button in the pop-up window.
3. Choose Wi-Fi from the drop-down menu when you’re asked to choose a connection type:
4. In next window, do:
When done, click the save button.
After above steps, a configuration file created under /etc/NetworkManager/system-connections directory. File name is same to the connection name you typed in step 4.
Now press Ctrl+Alt+T on keyboard to open terminal. When it opens, paste the commands below and hit enter to edit the configuration file:
When the file opens, find out the line
When everything’s done, enable WIFI from Network Manager icon on the panel. It should automatically connect to the hotspot you created. If not, select “Connect to Hidden Wi-Fi Network …” and select it from the drop-down box.
Now you can search and connect the access point from your Android mobile and enjoy!.
കംപ്യൂട്ടറിന്റെ MAC ID കണ്ടുപിടിക്കുന്ന വിധം
Click on the links, Download & Install
3 Ways to Create Wifi Hotspot in Ubuntu 14.04 (Android Support)
1. Disable WIFI and plug in an internet cable to your laptop
so that your Ubuntu is connect to a wired internet and wireless is
disabled.2. Go to Network Icon on top panel -> Edit Connections …, then click the Add button in the pop-up window.
3. Choose Wi-Fi from the drop-down menu when you’re asked to choose a connection type:
4. In next window, do:
- Type in a connection name. The name will be used later.
- Type in a SSID
- Select mode: Infrastructure
- Device MAC address: select your wireless card from drop-down menu.
5. Go to Wi-Fi Security tab, select security type WPA & WPA2 Personal and set a password.
6. Go to IPv4 Settings tab, from Method drop-down box select Shared to other computers.
When done, click the save button.
After above steps, a configuration file created under /etc/NetworkManager/system-connections directory. File name is same to the connection name you typed in step 4.
Now press Ctrl+Alt+T on keyboard to open terminal. When it opens, paste the commands below and hit enter to edit the configuration file:
gksu gedit /etc/NetworkManager/system-connections/wifi-hotspot
Replace wifi-hotspt with the connection name you typed in step 4.When the file opens, find out the line
mode=infrastructure and change it to mode=ap. Finally save the file.When everything’s done, enable WIFI from Network Manager icon on the panel. It should automatically connect to the hotspot you created. If not, select “Connect to Hidden Wi-Fi Network …” and select it from the drop-down box.
Now you can search and connect the access point from your Android mobile and enjoy!.
കംപ്യൂട്ടറിന്റെ MAC ID കണ്ടുപിടിക്കുന്ന വിധം
ഉബുണ്ടു 18.04 ൽ ഡിജിറ്റൽ സിഗ്നേച്ചർ ഇൻസ്റ്റാൾ ചെയ്യുന്ന വിധം
Click on the links, Download & Install
- Scratch 2 (download)
- eXe (download)
- tupitube (download)
- UP Science Resources (Std V, VI, VII) (download)
- Phet (download)
- UP IT Practical Resources (download)
- HS IT Practical Resources (download)


